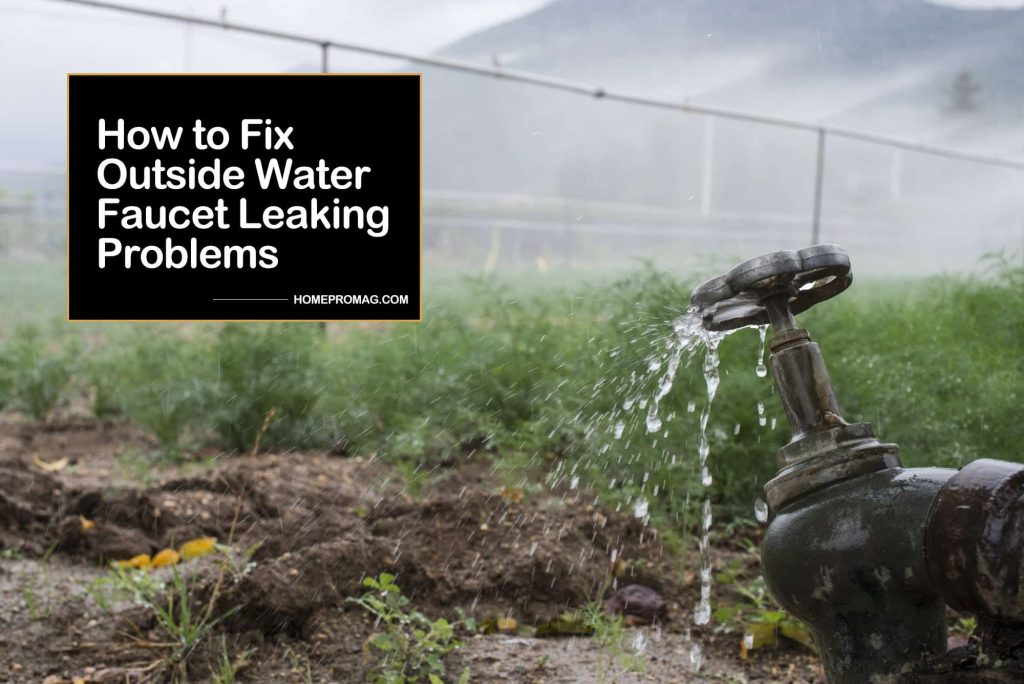
Every home has at least one outdoor water faucet to serve outdoor water and sanitation needs. It could be a yard hydrant, outdoor shower faucet, or a primary spigot.
Once in a while, you could notice an unusual patch of water around the faucet area or a continuous drip from the faucet even after turning it off. Leaking problems on plumbing fixtures are perfectly normal and bound to happen at any point in time.
It is, therefore, useful to have some tips at hand on how to fix these problems.
This article will provide tips to help you quickly fix outdoor water faucets.
Signs of a leaking outdoor water faucet include the area around the water faucet constantly looking damp. After some time, mold or mildew may grow around that area.
Why fix leaking outdoor faucets?
Water conservation is a significant concern. It is not only good for the planet but also for our pockets. Water leakages lead to wastage and higher water bills.
That is why it is important to occasionally check on all the outside faucets because, being on the outside, you may fail to notice the leaking immediately, especially if you don’t use it frequently.
Leaking outdoor faucets installed close to the house may cause damage to the building foundation or walls if left unfixed for a long time. Furthermore, leaky faucets are messy. They cause wetness that may lead to bigger problems than just a damp and unsightly spot on your lawn.
Fixing leaking problems will spare you unnecessary future expenses and wastage.
To find a solution to faucet leaking problems, you first have to find out the cause of the leakage. Establishing the exact cause has, to begin with, a thorough investigation of the system. You could even uncover more than one cause of the issue. Below are some of the main causes of outside water faucet leaking problems to help you with quick identification of the issue.
Causes of outdoor water faucets leakages and how to fix them
Malfunctions on outdoor water faucets are typically caused by poor workmanship during installation or damage of the hardware that happens over time. The solution to poor workmanship is to ensure a qualified and skilled person handles your plumbing. they should also be supervised to ensure proper execution of instructions.
Wear and tear of the faucet parts occur because they are operated manually. That is, turning the handle right to release water and turning left to stop the flow of water. After some time, this kind of frictional movement is bound to cause the hardware to wear off and become loose.
Some water faucets are made of metal material that is susceptible to corrosion that speeds up wearing. Rust can cause damage that could lead to leakages. When you see dirt or rust in the water coming from the faucet, it could be time for a fix or replacement. Depending on the extent of damage, you may or may not need to replace the entire faucet.
Wear and tear results in:
1. Broken seal
A thread-sealing tape is placed on all water connectors but may wear out over time causing leakages. The solution to this is to replace it. Simply remove the worn-out seal, clean the area underneath and wrap a new thread-sealing tape around the area.
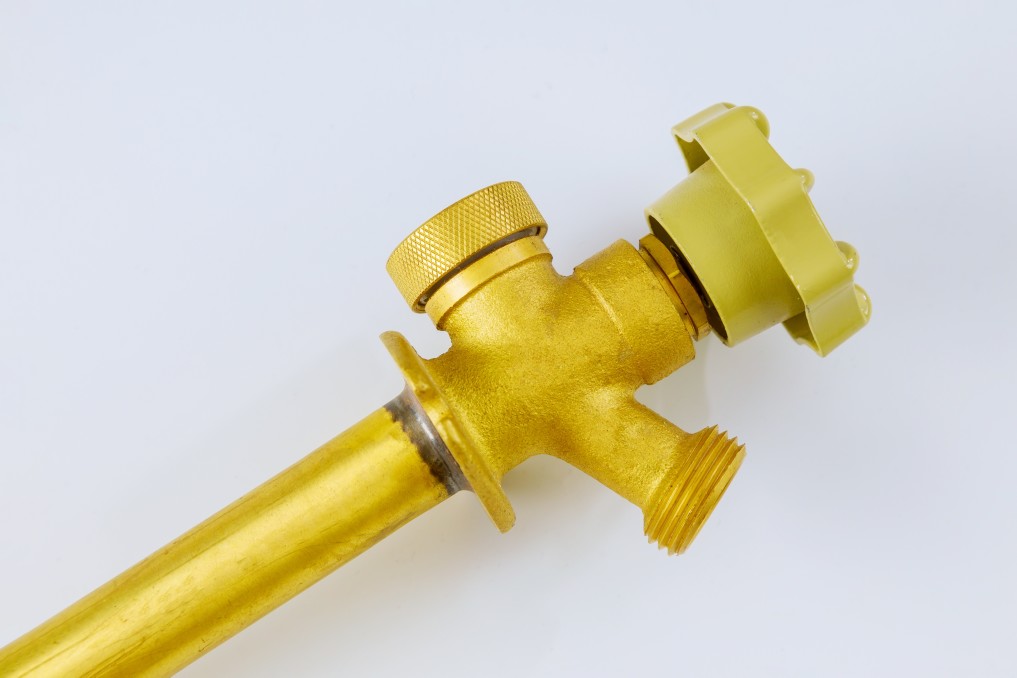
2. Loose packing nut
Most outdoor water faucet leakages are caused by a loose packing nut. The packing nut is responsible for creating a watertight seal in plumbing. It holds the packing that prevents water from leaking around the stem of the faucet. You could easily get away with tightening the packing nut using an adjustable pair of pliers. Follow the following steps to guide you:
- Check behind the handle of the outdoor faucet to find the packing nut.
- Fit the adjustable pair of pliers around the packing nut.
- Turn the pliers to tighten the packing nut. The turn should be about an eighth to a half turn, depending on how loose the nut is.
This should fix the leakage problem if the issue arose from a loose packing nut. Turn on the water to check whether it is still leaking. If it is not, then you have successfully stopped the leakage. If there is still water leaking, the problem is not the packing nut. The next course of action is to check the washer which could be faulty.
3. Faulty washers
A faulty washer needs replacement. It has to be removed and a new one installed. Make sure you have the new wash at hand for fixing after the removal of the faulty one.
- First, turn off the water from the main water supply valve and drain the water left in the pipes.
- Use the adjustable pair of pliers to loosen the packing nut. Do this by turning the pliers in an anticlockwise direction.
- Loosening the packing nut makes it possible to remove the water faucet handle to access the washer assembly.
- Loosen the screw below the valve stem and then take out the washer.
Replace the new washer in and fasten the screw. Reassemble the faucet in the same way it was removed. You can turn the water back on to check for further leakages.
Remember to turn off the water supply before beginning any major repairs. The water shut valve should be close to your water meter.
Turn the outdoor water faucet on to get rid of any water that could have been trapped in the supply pipes. This also confirms that you have successfully turned off the water. After the repair, you can turn the water on to confirm that you solved the problem.
As we have seen above, most standard outdoor water faucet leaking problems can be solved by simple DIY and basic tools.
You can consult a plumber if you are not very confident about doing it yourself or if the problem isn’t fixed even after repair. Ultimately, we hope you find this information helpful.