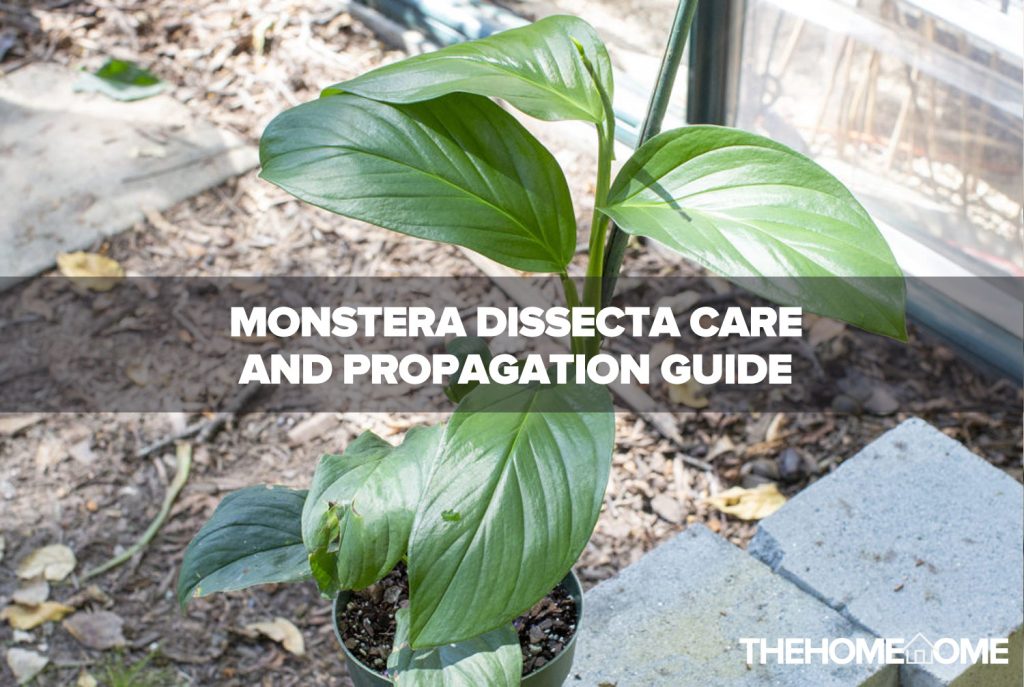
The Monstera dissecta is a show-stopping plant widely propagated for its oval shape, oblong holes, split ends, and glossy leaves. They can be used to enhance any aesthetic theme when cultivated in brightly colored containers.
The Monstera dissecta can grow up to 32 feet when grown outdoors but can grow up to 8 feet indoors. During their bloom time, the outdoor-grown Monstera dissecta produces white flowers.
So long as you are familiar with and follow the appropriate rules, propagating and nurturing the Monstera dissecta can be a simple task.
This article will teach you everything you need to know about Monstera dissecta propagation. We also included a care guide, as well as common mistakes made by growers that result in plant problems, and also the indicators and solutions. Growing tips have been added to help you enjoy your propagation experience.
Monstera Dissecta Plant Profile
| Botanical name | Monstera Dissecta |
| Origin | Brazil |
| Family | Araceae |
| Light | Bright indirect light |
| Watering | Moderate watering |
| Temperature | 65°F-80°F |
| Toxicity | Toxic to pets and humans |
| Propagation Style | Indoor and Outdoor propagation |
| Food | General-purpose fertilizer |
| Humidity | Low humidity |
| Foliage color | Green |
| Susceptible Plant Issues | Root rot, stunted growth, curled tips, wilting leaves, discoloration of foliage surface, cold injury, and Pest Infestations |
How to Propagate Monstera Dissecta
Propagating Monstera dissecta is an easy task as long as you follow all recommended guidelines. Monstera dissecta can be propagated through Soil, water, and air layering propagation.
1. Soil Propagation
- Step 1: Fill a well-drilled container halfway with your organic soil mix.
- Step 2: Thoroughly water the soil. Ensure it does not end up swampy.
- Step 3: Take cuttings from the Monstera dissecta mother plant. The cutting should be between 4-6 inches long. Cut below the node as the roots will grow from the nodes. There should be at least two leaves along the stem of the cutting.
- Step 4: Apply your rooting hormone to the base of the stem (optional).
- Step 5: Make a hole in your potting mix and insert your cutting till securely erect.
- Step 6: Place the container in an area where it can receive bright indirect light. Near a window or on a shady patio are good locations for the plant.
- Step 7: Mist the plant regularly to improve humidity.
With proper care, your Monstera Dissecta would grow roots within 4 weeks of propagation.
2. Water Propagation
Water propagation allows you to watch your Monstera dissecta grow since it is usually grown in a transplant jar. Follow these guidelines for water propagation:
- Step 1: Select and cut a healthy stem with at least 2 nodes.
- Step 2: Pour clean water into a clean jar
- Step 2: Place the cutting into the jar.
- Step 3: Ensure the stem is not submerged in water, as it can result in root rot.
- Step 4: Place the plant where it can receive bright, indirect light.
- Step 5: Change the water every 3-5 days regularly.
3. Air Layering
Air layering is mostly used for outdoor propagation. These are the guidelines for air layering propagation:
- Step 1: Moisten the organic soil mix with little water. The soil mix should not end up waterlogged.
- Step 2: Cut one of the Monstera dissecta branches at the base.
- Step 3: To prevent the cuts from sealing, place a thin piece of plastic between them.
- Step 4: Form a moss ball and secure the stem inside it.
- Step 5: Wrap the moss ball in plastic wrap.
- Step 6: Once the roots have fully formed, cut the branch from the mother plant.
- Step 7: Remove the plastic wrap from the moss ball but keep the moss ball intact.
- Step 8: Transfer the plant to an organic soil mix in a well-drilled container. Ensure the container is placed in a location where it can receive bright indirect light.
Monstera Dissecta Care Guide
We assure you of a thriving Monstera dissecta if the following growth requirements are provided adequately.
1. Organic Soil
The nutrients needed for a Monstera dissecta plant to thrive are found in organic soil. Organic soil is a naturally well-drained mixture that doesn’t get waterlogged easily. You may either buy organic potting soil or prepare your potting mix.
Organic matter can be added to the soil to increase its nutrient content while also lowering its acidity. Increase the organic matter in the soil by adding peat moss, coco coir, perlite, or mulch.
2. Proper Watering
Watering is a vital part of the Monstera dissecta care. The growth of your plant is hinged on the adequate supply of nutrients from the soil to the roots. You should water your plant at least once a week. Spraying the surface of the leaves with water is insufficient; a good soak is required to reach the plant’s roots.
Water is most needed at the roots of your Monstera dissecta. You can use a trowel or a moisture gauge to determine how much water the soil requires. Early morning or late evening are the best times to water your Monstera dissecta.
3. Adequate Light
Adequate light is needed to complement the supply of nutrients to the plant. provision of adequate light also maintains and improves the foliage appearance of the plant. Choose a spot where your Monstera dissecta will not be exposed to dim or direct light before propagating it.
Indoor-grown Monstera dissecta should never be kept in a dark location. Outdoor-grown Monstera dissecta should be kept in a location that receives bright but indirect sunshine.
4. Appropriate Container
A well-drilled container is the most appropriate container for your Monstera dissecta.
The presence of drainage holes in a well-drilled container decreases the risk of overwatering. In addition, select a container that is appropriate for the plant’s size. An under or oversized container can cause plant problems.
5. Temperature And Humidity
Grow your Monstera dissecta in an environment with room temperature and low humidity. Your Monstera dissecta should not be exposed to extreme weather conditions, whether hot or cold. If you can, move outdoor-grown Monstera dissecta indoors during winter or make use of frost blankets.
Avoid placing your Monstera dissecta near an air conditioner or heater. By misting your Monstera dissecta regularly, using a humidifier, or positioning them among other plants or trees, you can boost the humidity level for your Monstera dissecta.
6. Fertilization
Fertilization is required to maintain and improve the growth of your Monstera dissecta. Fertilizers can be used to supplement the nutrients in the soil. Fertilizers can be used to help with stunted growth.
Your Monstera dissecta will benefit from a general-purpose fertilizer. When applying fertilizer, always follow the directions on the label. This avoids overfertilization and allows you to achieve your desired outcome.
7. Pruning
Pruning your Monstera dissecta is essential for its continued growth. It’s important to regularly remove diseased, damaged, and dead leaves if you want your plant to thrive. This is because trimming allows new leaves to grow more quickly. Pruning also helps manage the shape of your Monstera dissecta, which improves its appearance.
It also aids in the eradication of pests. Pruning your Monstera dissecta regularly will keep it growing. All you need for proper pruning is a sterilized scissor to snip off diseased, dying, and dead leaves.
8. Repotting
You should re-pot the plant once it is rootbound and oversized for its container. Check for signs of roots spreading out of the drainage holes to identify a root-bound Monstera dissecta.
Monstera dissecta should be repotted every two years because the soil nutrient will deplete over time. Failure to re-pot your Monstera dissecta when due can cause problems for your Monstera dissecta, hampering its growth.
Monstera Dissecta Plant Problems, Signs, Causes, and Solution
These are the common problems Monstera Dissecta growers are likely to encounter when nurturing the plant
| Plant Problems | Signs | Causes | What to Do |
|---|---|---|---|
| Change in foliage appearance | Dry, wilted, and pale leaves. | Poor lighting Exposure to direct light Overfertilization Underwatering | Place the plant in an area where it can receive bright indirect light. Stay off fertilizing for a while and apply fertilizer as recommended by the label. Ensure the soil does not dry out before watering. Always keep the soil moist. |
| Change in foliage color | Yellow leaves Brown/Burnt tipsGrey patches | Poor lighting Underwatering Exposure to direct heat Poor humidity Pest infestation. Overfertilization Root rot | Place the plant in an area where it can receive bright indirect light. Water the plant thoroughly. Change the location of the plant to an area with medium lighting or place it in a shaded area. Mist the leaves regularly or use a humidifier. Stay off fertilizing for a while and apply fertilizer as recommended by the label. Repot the plant |
| Root rot | Change in foliage color and vigor Smelly roots Stunted growth | Underwatering Overwatering Overfertilization | Water the plants thoroughly. Do not directly spray the top of the plant instead water the roots. Use a moisture gauge before watering. The soil should not end p swamped after watering. Follow the label’s recommendation for fertilizing. Repot the plant if there is no improvement to give the plant a fresh start. |
| Pest infestation(mealy bugs, scale, spider mites, white flies, and thrips) | The appearance of pestsAppearance of holes and spots on the foliage surface. Dry and wilted leavesWebbing on the foliage surface.Stunted growth. | Cluttered environment Transmission from an infected plant or equipment. Poor humidity Infected potting mix | Keep your environment tidy and clean. Isolate infested plants to prevent spread and treat with insecticidal soaps and sprays. Mist the leaves regularly. Use fresh organic soil mix. |
| Sparse growth | Leggy plant | Underwatering Root rot Poor soil mix Transplant shockPoor lighting | Allow the water to soak through the plant but ensure it does not end up swamped. Repot the plant. Water the plant regularly and do not fertilize. Change the location of the plant to an area where it can receive bright indirect light. Use artificial light if necessary. |
How To Prevent Monstera Dissecta Plant Problems
Before propagating your plant, choose an area with bright light. Artificial light from bulbs can suffice. The plant should not be exposed to direct light as it could scorch the leaves, causing a change of appearance and color.
We recommend using a moisture gauge before watering. This prevents under or overwatering. A small trowel can also be used to determine if the soil has been sufficiently watered.
Use a general-purpose fertilizer and follow the label’s instructions for application. Avoid fertilizing during winter.
Sterilize pruning equipment before use.
Growing Tips For Monstera Dissecta
- Avoid watering directly over the top of the plant.
- You can improve the lighting of your home through these mediums: place a mirror opposite a bright light source so it can bounce back on the plants or use shelf light and grow bulbs/lamps.
- Always check for signs of pest attack.
- Regularly check for a change in foliage appearance and color.
- Apply fertilizer if you notice stunted soil or repot the plant with fresh soil.
- After propagation, avoid changing its environment to prevent the effect of a transplant shock.
Conclusion
Monstera dissecta is one of the best options for propagation since it is beginner-friendly and would thrive with the provision of basic growth needs. We recommend that you propagate more than one specimen in case one fails.
You can also use different propagation methods if your schedule allows for it.